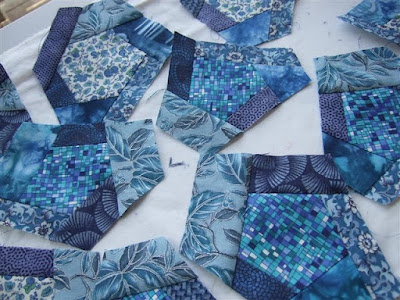
First rotary cut an irregular square -- meaning it should not be perfectly square and then cut one corner off.
 Now you should have a five sided shape - a pentagon. You can make a six sided shape if you would like too. Here are two photos of how I cut my 5 sided shapes.

I would suggest doing scrappy fabrics, then you don't have to keep any strips in order as you sew strips of fabric on your center shapes. Just have fun and go with it!
Press and trim the edges like the photo above.
In the next photo, I was stitching the second side and second strip of fabric onto the shape.
When I sew my strips on, I place the last strip on the top and feed it thru' the machine first. Then I am adding the strips around the shape in a clockwise fashion. But if you get it mixed up - just go the other way. It won't matter. I make at least two rounds on the shape. On some you may want to sew a few more strips of the third row to make it rounder or more irregular. Just have fun with it!
Press/iron after you sew each fabric strip onto the shapes. Press and trim as shown in the next photos.
The above photo shows how I trimmed the second strip.
The next photo shows trimming the third and fourth strips.
Keep sewing strips to all the sides until you have rounded the shape at least twice.
Apply the Heat n Bond Lite following the directions on the label. I cut the Heat n Bond Lite a little smaller than the piece I am going to adhere it to, so it doesn't stick to my iron or ironing board. Then when it cools I trim it close to the paper, so the adhesive is covering the whole piece out to the edges when I pull off the paper. This is important, because I want the flower to stay done tight on the background fabric. It is a method of raw edge applique'.
I trimmed around each shape with a scissors to give it a wavy edge.
You can see that the paper is still on as I cut.
Lay the flowers out on your background. Peel the paper off the back and press/iron the flowers in place.
I chose a whole piece of fabric as the background for this quilt.
I think a pieced texture background would be a great choice also.
Click on texture background for the tutorial on how to make it.
I made the spinning spiral flowers for my yellow bag differently. I trimmed each strip at an angle. Here is the post for this photo - How to make it - post. And here is the post with the completed Spinning Spiral Bag.
Quilt as desired.
I trimmed the outer edge wavy like the flowers and used bias binding to bind the quilt.
Have fun making the flowers!
Any Questions -- Leave a comment or email me at Marcia@craftysewing.com.
Have a wonderful Tuesday!
Marcia
P.S. Click on the top right photo of Me and Mom for current updates on my Mom on my personal blog. Surgery is set for Thursday.


