Showing posts with label Selvages. Show all posts

Tuesday, July 12, 2011

Mummy Loves Selvages

 I love selvage quilting.  I love Halloween.  It doesn't matter that it's July, right?  We'll just call it an early start.
 I am having a lot of fun free-piecing this guy.  (My sewing machine is still getting fixed, but thankfully I have a loaner.  Thanks Tina!)  This mummy just makes me smile.  He is turning out just how I imagined him in my head.  Everything it still rough and needs shaping and more selvages added, but you can get the idea.
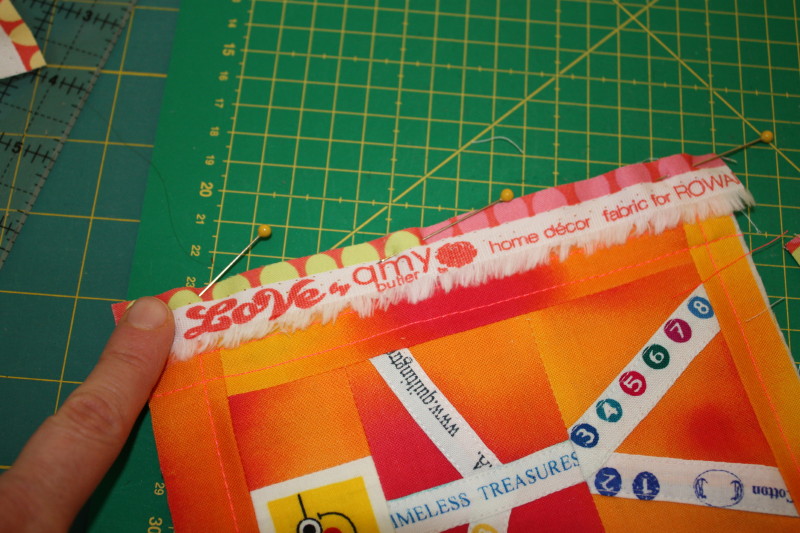
 Figuring out how to free-piece this hand definitely took some thinking.
-
I am planning to keep this mummy to a large wall hanging size, and I am declaring this, in writing, on this blog, so he doesn't end up life-size (like the crazy Selvage Snowman).  If I start posting mummy legs on here, somebody please send me an email and tell me to Step. Away. From. The. Selvages.
 Per usual, this project will eat through quite a few selvages.  Thank you so, so much to everyone who keeps me stocked in selvages!!!
I bought this dotted fabric as a possible border.  I kind of like it, we'll see ...
-
And now, for some linky fun, I'm hanging out with some other crafty types over at Fabric Tuesday and WIP Wednesday!
-
Thanks for stopping by.  And thanks so so much for the wonderful response to my previous post about my debut novel.  I sincerely appreciate all the kind words and support!
-
Posted by Riel Nason on The Q and the U.

Wednesday, June 29, 2011

The Summer of Sewing Smaller Stuff?

 I've made three quilts lately which were queen-sized or larger, so I think I am going to declare the next couple of months The Summer of Sewing Smaller Stuff ... smaller as in smaller quilts, like lap-size maybe, perhaps a pillow, perhaps (gasp!) a wall hanging ... we'll see.  I thought I'd show some of the things that are on my list of sewing to-dos. 
-
Above are my selvage countdown squares.  As you can see I have a big pile.  My original idea for these now seems a little boring, so new possibilities are brewing ...
 And I do have another selvage idea that doesn't involve the squares above but goes in a different direction entirely ... I'm so excited about this one!!!  And I am definitely telling myself that it doesn't have to be something life-sized like the Selvage Snowman.  Smaller is good.  Repeat after me.  Smaller is goodSmaller is good.
 Then of course there are my I-Spy hexies, which are my travelling project.
 And my vintage sheet obsession continues with this new quilt I just started ...
 Speaking of vintage, check out this vintage pillowcase I found the other day!  Cutest ever!!!  So these bears will quickly be made into something.  Pillows are small right?
 I Spy Planet Hexy still needs to be quilted.  It is kind of more medium than small, and I can't decide if I should send it out for quilting or do it myself.  I really want to do it myself, but I will have to get a walking foot.  Up until now I have just used the regular foot on the machine, but I would want to be really careful with this cool quilt ...
And finally on the topic of small, my daughter is small.  (Although don't tell her that, she is a BIG GIRL now, since she's four and everything).  I am looking forward to a summer of T-ball for her, 3 pitch for my son, lots of fun with family, friends, the pool, parks, picnics and lots of summer travel ...
-
Plus there is one more thing.  Although I don't mention it here much, what I do with most of my time is write.  (Here's a smidge about me, the "writer" on my literary agent's website) I am within days of finishing the first draft of my second novel.  My first novel, called The Town That Drowned is coming out in September.  I have lots of fun stuff falling into place for the summer and fall for book promotion.  I have been getting some exciting news from my publicist about literary festivals, book tour stops and book signings.  I can't wait to share more information with everyone as the novel moves closer to release. 
-
I hope everyone has a wonderful summer.  I really appreciate everyone who takes a few minutes of their summer to stop in here and hang out with me for a bit!
-
I'm linking up with W.I.P. Wednesday.  Cheers,  Riel
-
Posted by Riel Nason on The Q and the U

Tuesday, May 31, 2011

Selvage Quilt Binding Fringe Trim Tutorial

Remember these little selvage stick people? (Tutorial here)  Well, my guild has an upcoming mug rug swap, so I turned them into a little mug rug.  And see the little selvage fringe set inside the binding on the sides.  That's what this tutorial is for.  It's something I thought of a while back and wanted to try.  It is super easy to do!  So here we go ...
Quilt your item as desired and trim all the edges.
Prepare your regular binding which you want to use.  Select your selvages.  I just went with two sides of selvage trim this time, but you could easily do all four.  I also used selvages with a fuzzy/shaggy edge because I think it gives a better effect.
Trim your selvage pieces so 1/4 inch of fabric is showing above the white selvage part.
Pin your selvage to the edge of your quilted item.  Line the edges right up.
Sew just above the shaggy edge of the selvage.  See the photo below.
See?  You are sewing in quite a ways.
Just another pic showing this.
Next pin your binding in place, over top of the selvage.
This time, use a regular 1/4 inch seam allowance to sew the binding on, just like you usually would.  By using a 1/4 inch, the binding will be sewn just at the top of the white of the selvage underneath.
Handstitch your binding to the back, same as usual.  See the little selvage peeking out?  It's in there nice and secure.
Ta da!  A nice little selvage-y detail. 
-
I'd love to see a pic if you try this. 
-
Thanks for stopping by!  And of course since it is Tuesday, I'm linking with Fabric Tuesday at Quiltstory.

Wednesday, May 11, 2011

Selvage Stick People Tutorial

As promised, here's the tutorial for the selvage stick people like the ones I made for my Love-Serendipity-Family Quilt. This just may be my favourite use of selvages yet! This is more of a method tutorial than anything with exact measurements, as improvisation is part of the fun.

My apologies that some of the text on the photos isn't showing the best. Everything looked great until I loaded the pictures into blogger. I will clarify below the photo for anything that is hard to read.

So here we go! First, the supplies you'll need ...

Fabric with heads to fussy cut.
Scraps of background fabric. Solids work best I think. If you make a stick woman, you will need a teeny scrap of fabric for the skirt. You should have white thread as the stitching on the selvages will show.
And the key ingredient, selvages ...

And now to get to the making part ...
Prepare your selvages by trimming each so just 1/4 inch of fabric is showing above the white. You really only need a few small selvage strips, but prepare a few extras to give yourself some choice and have back-up in case you make a mistake.


Set your selvages aside and fussy cut the heads you are going to use. Cut them out into a square or rectangle for easy piecing. Be sure to cut 1/4 inch more than the part you want to show, all the way around. If you don't have any head fabric, you could use plain white fabric and draw on a face, or even laser print an actual photo of a family member onto fabric and use that.


Cut background scraps for the body. You will need a leg section and an arm section.


Cut selvages for the arms. Let the ends of the selvage go right off the edge of the fabric as you will be trimming later anyway. Carefully trim the edge that meets the middle line at an angle. When you lay the selvages out to sew them on, be sure the guideline is centered beneath each one.

Sew the arm sections on. Topstitch (regular stitch) really close to the edge of the selvage all the way around. It is like raw edge applique, except the great thing about selvages is that it isn't a raw edge, it is finished.


Be sure the leg selvages overlap at the top for a nice skinny waist for your stickperson.


Now it's time for final adjustments. Press and trim. Trim the sides to adjust the arm length. Shorten the legs by trimming too, if you like.

So that makes Mr. Selvage Stickman ... here are a few little adjustments if you want to make Ms. Selvage ...

Cut a little triangle scrap for a skirt.


Sew two little selvage strips for legs. The skinniest selvages you have are best. Make sure the legs are not wider than the bottom of the skirt.


Piece your stick person into a background. Voila! Now, add these into your quilt, pillow, placemat, mug rug ... the list goes on.

If you make any selvage stick people I would LOVE to see them.

Also, if you use this tutorial to make these and post your results online, please link to this tutorial as your source, since this is my original idea and content.

Thanks for stopping by. Happy Selvage Quilting!